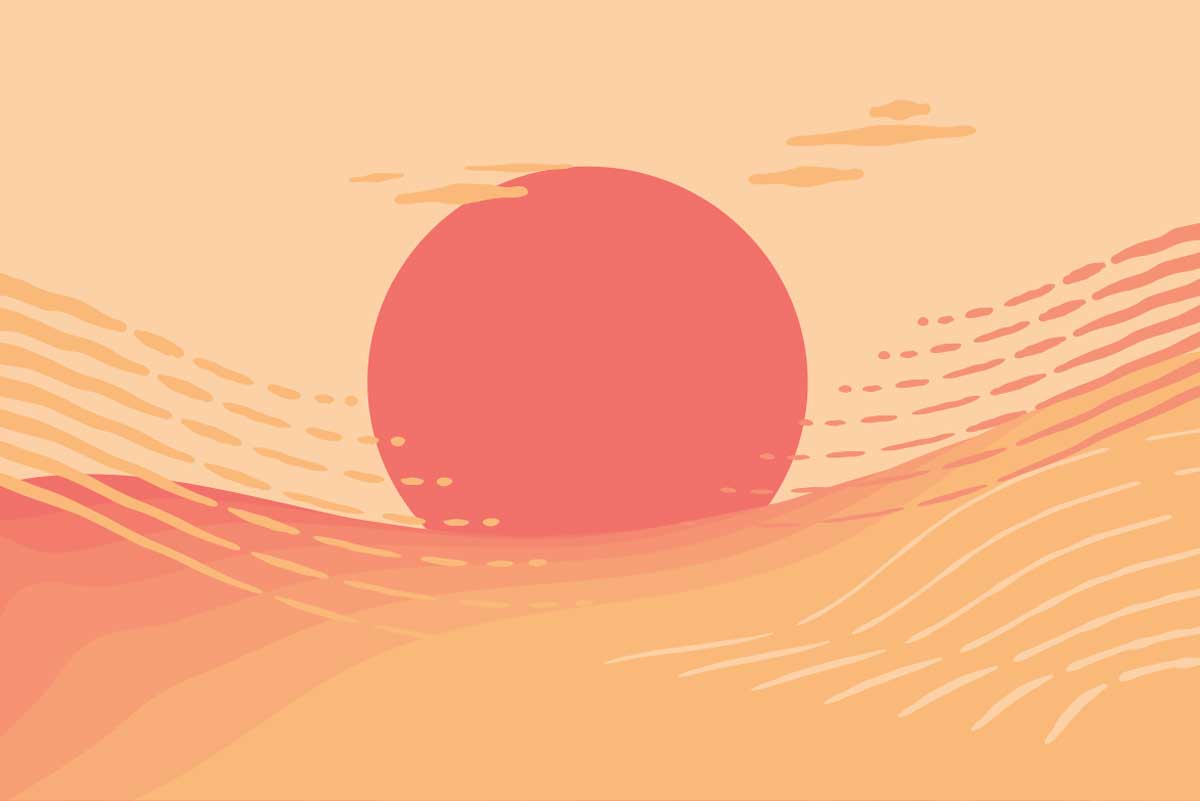
Surya means Sun, Namaskar means to salute or to honour, Surya Namaskar is a “ritual”, where we worship the “Sun”, which is not just the star that gives life to this planet, but it is the symbol of vital energy, the energy that allows us to be alive.
Sun is the planet that governs your vitality, your soul, your self respect, your status and reputation, your health, your eyesight, your physical power, your leadership quality, your father or father figure, your son or grandson.
As well as the physical benefits of keeping the body in shape and the mind calm and health, Surya Namaskar is a ritual that can strengthen the Sun in your birth chart – strengthen the areas of your life mentioned above – and serves as a great remedy for a weak Sun placement.
It also gives you the opportunity to express gratitude for the Sun sustaining life on this planet.
HOW AND WHEN TO DO SURYA NAMASKAR
Surya Namaskar is best performed in the morning and on an empty stomach. Sunrise is the optimum time but it’s fine to do it at any time of the day.

Each round of Sun salutations consist of two sets, 12 asanas (yoga poses) complete one set of Surya Namaskars and a second set is completed when the alternative leg leads the sequence. There could be slight variations of Surya Namaskar found but it’s best to find one sequence to practice regularly for best results.
Start the practice with a feeling of grace and gratitude towards the energy of the Sun. Perform the Sun Salutations (start with complete 5 rounds and then you can build yourself up to more rounds each week), followed by other yoga postures if you wish and then by a meditation/mantra practice if you have one.

1: Pranamasana (Prayer pose) Stand at the edge of your mat, keep your feet together and balance your weight equally on both the feet. Expand your chest and relax your shoulders. As you breathe in, lift both arms up from the sides and as you exhale, bring your palms together in front of the chest in prayer position.
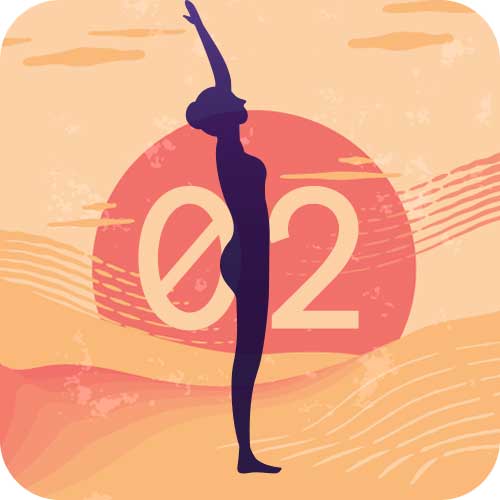
2: Hasta Uttanasana (Raised Arms pose) Breathing in, lift the arms up and back, keeping the biceps close to the ears. In this pose, the effort is to stretch the whole body up from the heels to the tips of the fingers. To deepen the stretch you can push the pelvis forward a little bit and reach up with your fingers rather than trying to bend backwards.
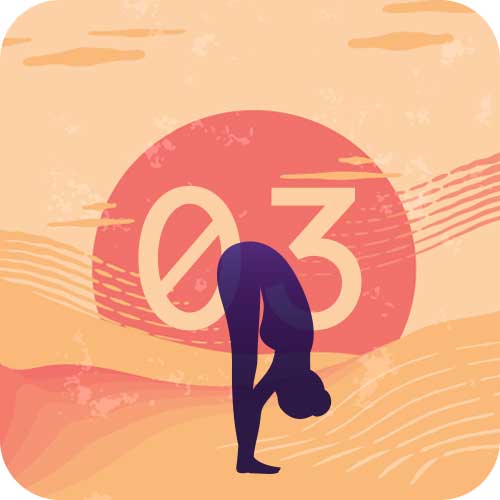
3: Hasta Padasana (Hand to Foot pose) Breathing out, bend forward from the waist, keeping the spine erect. As you exhale completely, bring the hands down to the floor, beside the feet, bend the knees if necessary to bring the palms down to the floor. Keep the hands fixed in this position until the sequence is finished.
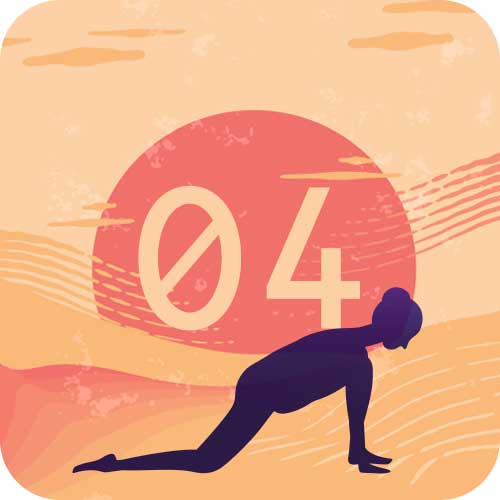
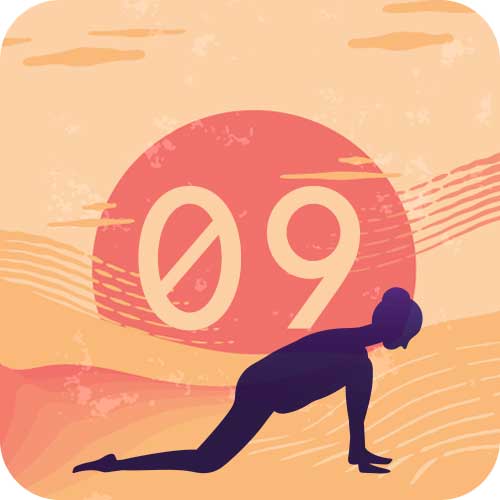
4: Ashwa Sanchalanasana (Equestrian pose) Breathing in, push your right leg back, as far back as possible. Bring the right knee to the floor and look up and ensure that the left foot is exactly in between the palms.
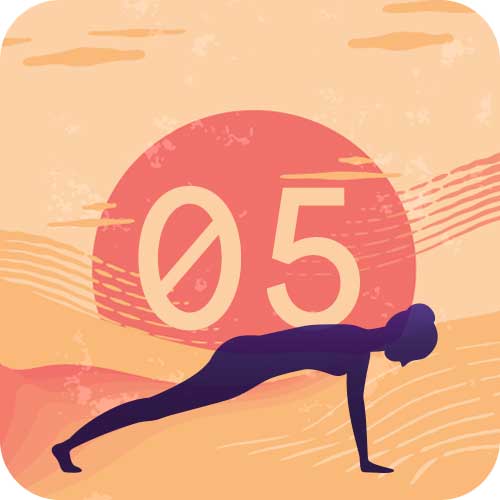
5: Dandasana (Stick pose) As you breathe in, take the left leg back and bring the whole body in a straight line. Keep your arms perpendicular to the floor.
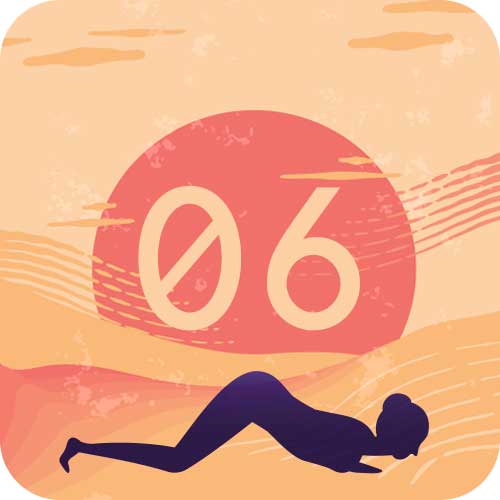
6: Ashtanga Namaskara (Salute With Eight Parts Or Points) Gently bring your knees down to the floor and exhale. Take the hips back slightly, slide forward, rest your chest and chin on the floor. Raise your posterior a little bit. The two hands, two feet, two knees, chest and chin (eight parts of the body touch the floor).
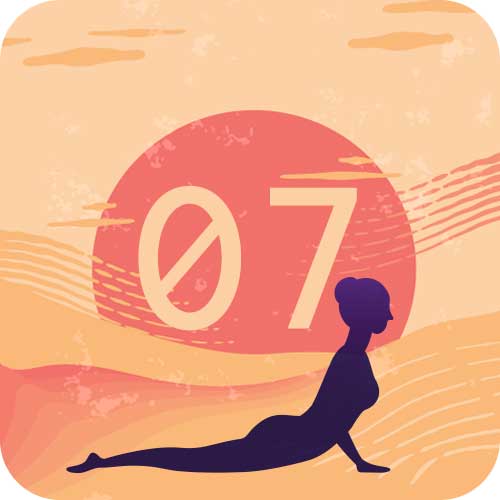
7: Bhujangasana (Cobra pose) Slide forward and raise the chest up into the Cobra posture. You may keep your elbows bent in this pose, the shoulders away from the ears. Look up. As you inhale, make a gentle effort to push the chest forward; as you exhale, make a gentle effort to push the navel down. Tuck the toes under. Ensure you’re stretching just as much as you can; do not force.
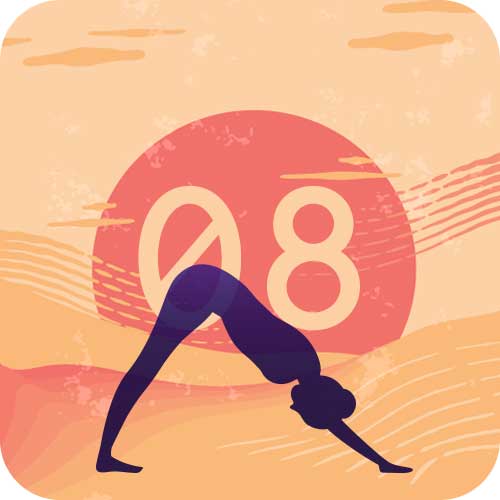
8: Parvatasana (Mountain pose) Breathing out, lift the hips and the tail bone up, chest downwards in an ‘inverted V’ (/\) posture. Try to keep the heels on the ground and make a gentle effort to lift the tailbone up, going deeper into the stretch.
9: Ashwa Sanchalanasana (Equestrian pose) Breathing in, bring the right foot forward in between the two hands, left knee down to the floor, press the hips down and look up. Place the right foot exactly between the two hands and the right calf perpendicular to the floor. In this position, make a gentle effort to push the hips down towards the floor, to deepen the stretch.

10: Hasta Padasana (Hand to Foot pose) Breathing out, bring the left foot forward. Keep the palms on the floor. You may bend the knees, if necessary. Gently straighten the knees and if you can, try and touch your nose to the knees. Keep breathing.
11: Hastauttanasana (Raised Arms pose) Breathing in, roll the spine up, hands go up and bend backwards a little bit, pushing the hips slightly outward. How to deepen this yoga stretch? Ensure that your biceps are beside your ears. The idea is to stretch up more rather than stretching backwards.

12: Tadasana As you exhale, first straighten the body, then bring the arms down. Relax in this position, observe the sensations in your body.
In meena lagna sun in 11th house and moon saturn mars in 8th house and jupiter mercury venus in 10th house and ketu 9th house.suggest remedy for wealth
Hey pretty interesting